Tuesday, July 27, 2010

Ai's Shrimp Spring Rolls


Ai's Shrimp Spring Rolls
(Goi Cuon Thom)

I made these at our friends Ming & Ray's "Party on the Pier" this weekend.  It was INCREDIBLY HOT  and I couldn't stand to look at warm food not to mention eat it.   The only thing I had on the brain was spring rolls.  Vietnamese spring rolls ("goi cuon") are rice paper wraps with rice noodles, fresh veggies and boiled shrimp and/or pork.  They can be eaten year round, but are especially popular in the summer.  Traditional spring rolls are made with shrimp and pork (with the fatty skin included).  I just prefer not to make this for my family and definitely omit this when I'm making them for a party.  You can also use sliced chicken breasts, which works just fine. 

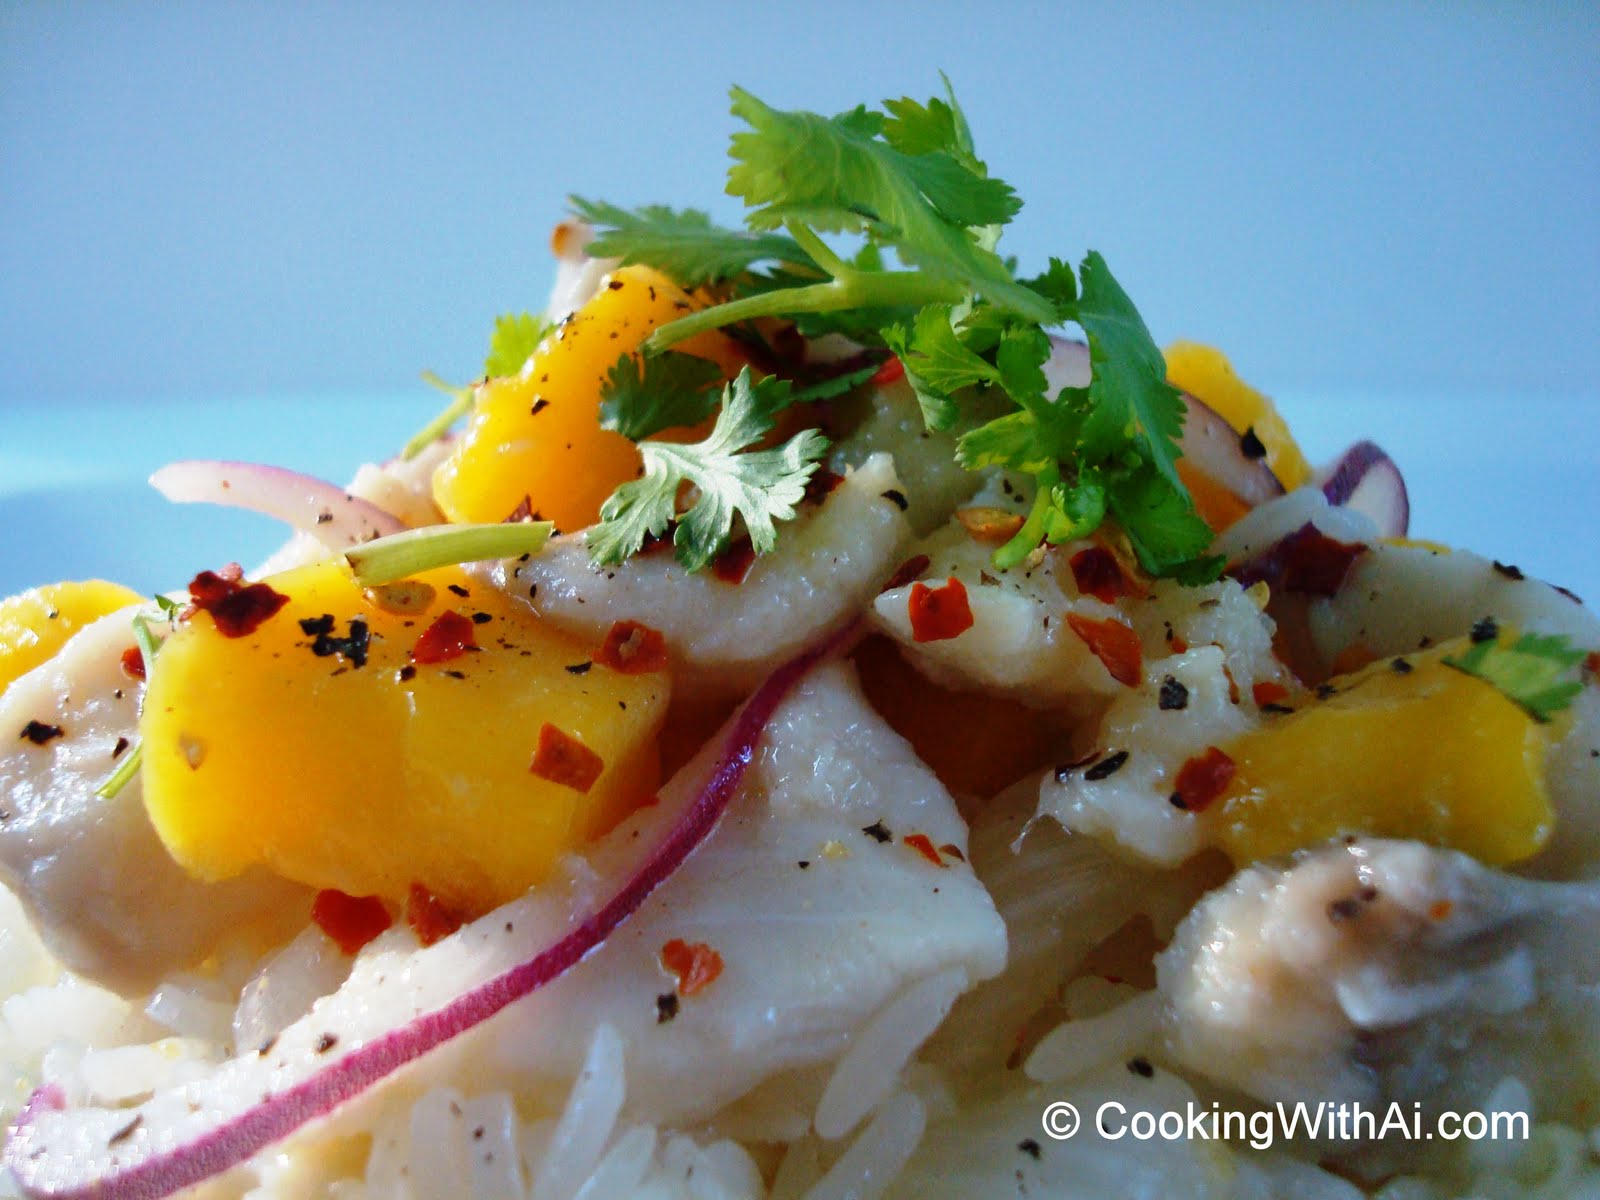
Those who have had the pleasure of eating "goi cuon" are already salivating right now.  For those who haven't, I will try to describe in words the experience.  As soon as it hits your tongue, you taste a nutty sweetness from the peanut sauce dip.  Every bite is soft, chewy and crunchy at the same time.  We kept the rolls in a cooler which made these even more fantastic when it's over 100 degrees out.  Just make sure to keep them covered the whole time to prevent the wraps from drying out. 

I am sharing with you our family recipe.  This is based on my personal preference on how I like to eat my spring rolls.  I like to add a variety of texture to all my dishes and spring rolls are no different.  Therefore I use a large variety of veggies:  Iceberg Lettuce, Green Leaf, Green & Red Cabbage, Cucumbers, Carrots and Jicama.  I know off the bat it may seem like a lot of veggies.  However, if you have the all the tools (see below), it'll be a cinch.  I guarantee you will not get this at a restaurant, but it tastes so much better, looks better and is much healthier too.  This is a great way for parents to squeeze in nutrient dense veggies without protest.  Even kids who absolutely hate veggies will devour this.  You can really add whatever you want in the veggie department.  Below is the recipe for Ai's Spring Rolls. 

Ingredients

2-3 Dozen Small to Medium Cooked Shrimp  (sliced in half)
1 Pack of Rice Paper Wraps
1 Pack of Rice Noodles 
1/2 Iceberg Lettuce
1/2 Green Cabbage
1/4 Red Cabbage
1 Head Green Leaf Lettuce
1 Cucumber (Julienne)
1/2 Large Jicama (Julienne)
2 Carrots (Use kiwi peeler)
1 Bunch of Cilantro (rough chop)
1 Bunch of Mint or Basil 
Non-stick Spray

Peanut Sauce:

1/2 Cup Peanut Butter
1/2 Cup Hoisin Sauce
3 TBSP Sesame Oil
1 Cup Water
Crushed Peanuts for garnish


STEP 1:  Rice Noodles- Boil the rice noodles for 5-6 minutes.  Drain, rinse with cold water and drain again.  Spray non-stick all over while you fluff it with your hands so it won't be too sticky when you are ready to work with it.

STEP 2:  Veggies- Use a knife and thinly slice iceberg and green leaf lettuce.  Not paper thin and definitely not bulky or your rolls will turn out bulky.  Since the cabbages are so much thicker, I definitely recommend using a mandolin slicer.  Also use the julienne blade on the mandolin to julienne the cucumber and jicama.  For the carrots, use a Kiwi Peeler and make thin noodle-like strips.   If you don't have one on hand, just omit it.  In this case, carrots tend to be too hard even if you julienne them and will either stick out or are too thick compared to the other veggies.   When you're done, combine all veggies and herbs in a large mixing bowl and toss together.  (Must give credit to my girlfriend Huong who taught me this.  Saves so much time when you wrap.)

STEP 3:  Shrimp- Slice the shrimp in half lengthwise.  Depending on how big they are, you can use two or three pieces per roll. 

STEP 4:  Wrap- Find a bowl (or skillet works just as well) that is as wide or almost as wide as the rice paper and fill it almost to the brim with cold water from your sink.  Quickly dunk the rice paper in the bowl.  Make sure you evenly wet the entire surface area front and back.  Lay the rice paper on a cutting board.  Next place two to three pieces of shrimp with the outside skin facing down so it will show though when you are finished wrapping.  Place them at the bottom of the wrap.  Leave an inch of space.  Then take a "five-finger pinch" of veggies and lay it nice and neat over the shrimp.  Do the same with the rice noodles.  A little goes a long way here.  If you put too much on this, it will end up looking like a burrito instead, not to mention  it will be hard to roll. 

STEP 5:  Roll- It's OK if the rice paper still feels a little stiff.  I actually prefer to roll it like this.  You have more control plus it looks better after it softens.   To begin rolling, lift the one inch lip at the bottom, fold it over the stuffing and roll it one time.  Keep it nice and snug.  Once you've made one full roll,  use both hands to fold in the sides.  The paper should be a bit stickier now, which should make it easier for you to do this. Once the sides are folded in, complete the wrap by rolling it all the way through. 

Spray non-stick on a big platter and place your finished spring rolls on it.  If you end up running out of space, spray both sides of a piece plastic wrap, place it on top of your first layer of rolls and stack your second layer on top of it.  (If you're having a party and presentation is important, just use another platter or use a rectangular casserole where you can tuck in the plastic wrap.) 

Peanut Sauce:
If you're good at multi-tasking and want to save time, prep the sauce while you are working on the spring rolls.  Combine all ingredients in a small sauce pan except save 1/2 cup of water for the end.  Heat on medium low heat and stay close so you can stir off and on and make sure it doesn't burn.  Towards the end, the peanut butter and hoisin sauce should be 90% blended and thick.  You'll see tiny specks of peanut butter.  Have no fear, this is when you add the remaining water, stir and watch the mix turn completely smooth.  Silky smooth!  If you won't be eating right away, expect the sauce to thicken as it cools completely.  You can always add a bit more water to thin it out if the sauce gets too thick for your liking. 


NOTES:

  •  The type of rice paper you use does make a difference.  I have used some terrible ones and now stay loyal to the Three Ladies Brand.  You can get it at most Asian stores. Obviously it has three ladies on the cover.  It's smooth and it holds together well once you're done.  It's also very forgiving if you're a rookie wrapper.   If you can't find this, look for a wrap that is super smooth and lays perfectly flat. 
  • Make sure to wipe your cutting  board after a few rolls.  If it's too wet, the rice paper will get too soggy. 
  • Must haves for this:
    • A Kiwi Peeler is an Asian cook's best friend.  It gives you long, thin noodle-like slivers that you can't get with a mandolin slicer.  This is one of the ways I get my meat-lovin' boys to eat their veggies fresh.  I use this on cucumbers, carrots, jicama and green papaya.  Same veggies, new texture.  This is one of my favorite tools. Why couldn't I have invented this?
    • An OXO Salad Spinner  This is another cool must-have.  There's a lot of lettuce and herbs you will be washing and drying for these spring rolls.  Here's what I love about this:
      • Larger capacity to dry more veggies
      • Push the top down and use it to store veggies that you end up not using
      • Use it as a salad bowl.  When making spring rolls, after I spin dry, I take the plastic net out and use it to hold all the veggies and herbs while I'm wrapping.   Read the reviews for this, they're great.   
Click Here to Purchase these items from Ai's Kitchen Store

    Thursday, July 22, 2010

    Vietnamese Stuffed Tomatoes


    Vietnamese Stuffed Tomatoes

    This was a hit with Dave and the kids last night and extremely easy to make.  I stuffed large Hanover tomato halves with ground turkey, grated carrots, scallions and onions, then pan seared and baked them for 20 minutes.   This was served with a side of rice and sauteed squash grown by my girlfriend Huong (thank you Huong!).   The tomato was yummy.  The stuffing was yummy.  When you combine the two, it was simply amazing!  I'm a firm believer that if an entree is that good, you could eat it with just plain rice.  And these Vietnamese Stuffed Tomatoes are that good AND easy to make!  This is definitely a "hug me" dish.  You will get hugged for this, I promise!  

    (A BIG favor:  If you like this, please use the share link at the bottom and post to your FB profile or email to your best buds!  "Cam On!" - Thank you in Vietnamese.)  


    Ingredients
    2-3 Large Tomatoes
    1 Pack of Ground Turkey
    1/2 Extra Large Onion or 1 Small Onion (minced)
    1 Large Carrot (grated)
    3-4 Stalks of Scallions (chopped)
    3 Garlic Cloves (minced)
    1/4 Cup + 1/2 TBSP Fish Sauce
    1 TBSP Roasted Rice Powder 
    1 TBSP Garlic Powder
    4 TBSP Sugar

    It's best to use a food processor to get the onion to the right consistency.  You want to mince it as much as you can without turning it into a complete puree.  You can throw the garlic in at the same time as well. 

    STEP 1:  Preheat oven to 450 degrees.  Cut tomatoes in half horizontally.  Take a paring knife and cut around the inside edge.  Then make several horizontal and vertical cuts to the core.  This will make scooping it out much easier.  Then place tomato on a cutting board for support and use a large spoon to scoop everything out.  You should have a  nice tomato shell when you're finished.  

    STEP 2:  Combine all stuffing ingredients and mix well.  

    STEP 3:  Use a rubber spatula to stuff the tomatoes and smooth the top.  

    STEP 4:  Add about 1/4 inch of oil to a stainless steel skillet on medium high heat. Once the skillet is hot, place the tomatoes top down and pan sear for about 30 seconds to 1 minute.  When the top is seared, flip and sear the bottom.  Use a metal spatula in one hand and a wooden/metal spoon in the other to support the bottom.  Sear for about 2 minutes then place in oven for about 20 minutes.

    NOTES:

    • While tomatoes are in the oven, you have time to saute or grill a nice veggie side dish.  And you should have learned by now that the rice cooker is always filled with warm rice right?  

    • You can buy roasted rice powder at any Asian grocery store.  It adds a nice roasted flavor to this dish.  But if you can't find it or don't have any on hand, you can leave this out. 
    • Don't forget to drizzle the juices leftover in the skillet back on your tomatoes and in your rice.  It's a wonderful combination of tomato, turkey and onion juices.  Can we say insanely mind-blowing delicious? 
    • A must-have to make this dish: 

    Tuesday, July 20, 2010

    Kung Pao Fried Fish


    Kung Pao Fried Fish

    I know this may look elaborate and you probably don't eat like this very often for dinner, but once you find out how simple and easy this is, it may become a weekly dinner dish.  All you do is fry the fish then pour the sauce on top.  That's it!  The fish took me just under 10 minutes to fry.  The sauce was done in 5.  The rice was just sitting there waiting for me to scoop.  I coupled this with a garlic and salt green bean stir fry which took another 5-6 minutes.  Once again, you're looking at dinner in 30 minutes or less! 

    The fish I used was a barb fish I bought from the Asian grocery store.  It was actually frozen and yet it still tasted fresh.  You can use any white fish you find. My preferred way of eating fish is completely whole with the skin on. You miss the true taste of fish when you fillet them.  The skin is what adds texture and richness to the meat, not to mention the extra good fatty acids to keep you looking younger! 

    Ingredients

    Whole fish (de-scaled and gutted)
    Cornstarch
    Vegetable/Canola Oil

    Kung Pao Sauce:

    3 TBSP Soy Sauce
    1 TBSP Sesame Seed Oil
    1 TBSP Honey
    1 TBSP Thai Sweet Chili Sauce
    1 TBSP Vinegar
    1/2  TBSP Cornstarch
    1/2- 3/4  TBSP Crushed Red Pepper (Even more if you like it spicey) 
    3/4  TBSP Garlic Powder
    1 TBSP Onion Flakes
    1/4 - 1/3 Cup Roasted Peanuts
    1/4 Cup Scallions (chopped)


    STEP 1:  De-scale and clean your fish.  Pat dry with paper towels.  Then make 3-4 diagonal slits on both sides of the fish.  Make sure to leave half an inch or so of space on the top and bottom.

    STEP 2:  Combine all the sauce ingredients except for peanuts in a glass bowl. 

    STEP 3:  Roast peanuts in a small pan under medium heat.  Make sure not to burn them.  You're just trying to wake up the aroma that comes from the oils in the nuts.  This should take a couple of minutes. Remove from heat when you're done. 

    STEP 4:  Fill a wide skillet with oil just under half full and turn your burner somewhere in between high to medium high heat.  While the oil is heating, place cornstarch in a small wire strainer and dust the entire front and back of the fish.   Once oil is hot, hold the tail and gently lay the fish in the pan. Make sure fish fits perfectly in the pan and lays flat. Fry on each side for approximately 4 to 5 minutes depending on your fish.  Once you see the bottom has turned golden brown, take a straight metal spatula in one hand and a pair of tongs in the other and gently flip your fish.  When the other side has turned golden brown, scoop the fish out and lay on a tray of paper towels.  After a couple of minutes, place your fish on a platter. 

    STEP 5:  Give your sauce bowl a quick stir and microwave it for 15-20 seconds just to activate the cornstarch and heat the scallions.  If you overheat it, just add a bit of water to reconstitute it.  Add this to your peanuts, stir, then pour and smear over fish.  Save some sauce for the bottom half of your fish.  True, it won't be as crispy as the top but it'll taste just as good!  Garnish with cilantro and extra scallions if you like.


    NOTES:

    • While you're shopping for your fish, take into account the circumference of your skillet.  Don't get a fish too large for your skillet.  You want it to lay flat so it will cook evenly and not curl.   If you don't have a 14" skillet, invest in one.    I love the stainless steel skillets.  It's better for you and you can put them in the oven, which I do almost every time.   (Click here to buy one from my Kitchen Store).  It will save you so much time and hassle.  So many times I've had to use an extra skillet because I couldn't fit 2 extra steaks or pork chops in one skillet.  This not only results in twice the amount of dishes to clean but can also lead to uneven cooking. 
    • If you're going to make side dishes with this, save the cornstarch dusting and frying for the very end.  

    Sunday, July 18, 2010


    Heavenly  Blueberry Pancakes
    w/ Homemade Whip Cream

    Yes, you heard me right.  Made these this morning and they tasted every bit as heavenly as they look!   I got a really nice tight hug from Liem after he was done eating.  It made me want to whip up another batter just for that!

    Ingredients

    2 Cups Fresh Blueberries (reserve another 1/2 cup for later on while you are pouring batter)
    2 Cups Flour
    4 Eggs (separate yolks from whites)  
    1 1/2 Cup Milk
    1 TBSP Baking Soda
    1 TBSP Sugar
    1 tsp Salt
    1 TBSP Vanilla Extract

    (makes 8 pancakes)

    STEP 1:  Beat the egg yolks, vanilla, and milk together in a large mixing bowl.  Sift flour, baking soda, sugar and salt into the same bowl.  Take a spatula and fold everything together.  DO NOT get too spatula happy and over mix.  You want to do the bare minimum on this.  Then fold in the blueberries, once again, use as few strokes as possible.

    STEP 2:  Using a hand blender, whip egg whites until they stiffen up.  I stop right before they form hard peaks.  It should be triple the volume.  Carefully fold this into your batter until well blended (as few strokes as possible).  This will provide the added moisture and structure to your pancakes.

    STEP 3:  Pour 1 cup of batter on griddle at medium heat or 325 degrees for an electric griddle.  It's a little different from cooking plain pancakes.  Don't wait until you see bubbles all over to flip. It will be too brown on the bottom.  Pour, wait until it sets, then take your spatula and ease up under it, and then flip.  The first flip will tell you whether you should continue flipping the others or wait a few seconds. Be fast with the flipping, remember, they are heavy with blueberries!

    If you see missing spots when you pour the batter, use the reserve berries to place them where needed.  Or you can use your fingers to reposition some that haven't set in. 


    Whip Cream:

    Whip 1 cup of heavy whipping cream with whisk attachment until stiff.  It takes these pancakes up to another dimension, trust me.  After you eat blueberry pancakes like this, it's just not the same without it. It's definitely worth the extra minute! You can also add 1/4 cup of powdered sugar if you want your cream to be sweeter.

    NOTES:

    •  Cut your time in half by using an extra wide electric griddle.  Here's the one I use:  
    Heats quickly:  Reaches temperature within 1-2 mins.

    Easy clean-up:  When finished, just wipe a few times with a soapy dish cloth

    50% Larger:  I cook 5 super large pancakes in one batch.  Two batches only takes 5-6 minutes.  You can also throw bacon on while you're making your pancakes and forget about washing any pans when you're done. (Try microwaving bacon for 1-2 minutes then throwing it on griddle for time saver and easy cleanup.) 

    Friday, July 16, 2010

    Dragon Drumsticks


    Dragon Drumsticks

    What do you make for four hungry boys that would put a smile on their faces?  Dragon Drumsticks of course!  I named these drumsticks for little Linh, my girlfriend Huong's son,  who's not only teeny tiny but picky as well.  I firmly believe kids aren't picky.  They simply need their palates expanded.  And that's exactly what we did for Linh today who cleaned his plate!

    These grilled drumsticks have a savory glaze from a combination of fish sauce, soy sauce and Thai sweet chili sauce and are incredibly juicy.   Finally,  sprinkle toasted sesame seeds for a nutty crunch and you'll be wondering why people even consider deep frying these babies.  

    Ingredients

    30 Drumsticks (Once again, Costco is the way to go.)
    1/3 Cup Soy Sauce
    1/3 Cup Fish Sauce
    1/2 Cup Sugar
    3 TBSP Garlic Powder
    1/3 Cup Dried Onion Flakes
    1/3 Cup Thai Sweet Chili Sauce 
    1/2 Cup Chopped Scallions  
    Sesame Seeds

    If you've never used Thai Sweet Chili Sauce before,  it looks like the clear orange duck sauce that's used in Chinese restaurants. You can find this at most Asian grocery stores and maybe your local grocer.  But I never bother to go to the major grocers for Asian sauces unless I'm absolutely desperate and pressed for time. 

    You'll need a large roasting pan for marinading and cooking this.  I use the long rectangular aluminum catering pans.

    STEP 1:  Place drumsticks in pan.  Add soy sauce, fish sauce, sugar, onion flakes and garlic powder. Use your hands to mix ingredients well with drumsticks. 

    STEP 2:  Pre-heat oven to 450 degrees and also pre-heat grill to approximately 400 degrees.  You will grill first then finish off in the oven.  Once the grill is hot, grill drumsticks for about 5 minutes with lid off.  Keep an eye on your drumsticks and keep turning them to avoid over charring since the fat on the skin will burn off faster.  Once you've got nice grill marks on both sides, take drumsticks off grill and place them back in the marinade pan.  You should still have marinade sitting in it. 

    STEP 3:  Pour Thai chili sauce over drumsticks and toss to coat evenly.  Place pan in the oven for about 20 mins.  Half way through, open oven and sprinkle scallions over drumsticks and cook for remaining 10 minutes. 

    STEP 4:  After 20 minutes, take pan out and sprinkle drumsticks with sesame seeds.  

    You can enjoy this with rice or noodles. It's so good you can just eat it with plain white rice and just drizzle the juices from the pan over it!  

    By the way, this also makes a great party platter.  Brought it to a pool party and one of the moms was amazed that her son, CJ who never eats anything, was actually eating it and went for seconds!  Love them Dragon Drumsticks!!

    If you have friends with kids who barely eat anything, pass this on to them and let's let them be the judge.  Keep  me posted!


    Monday, July 12, 2010

    Tilapia Ceviche with Mango


    Tilapia Ceviche with Mango

    I made this for us to eat during the World Cup Finals.   Ceviche is a great summer dish that's unbelievably easy and so very delicious.  There's very little cooking involved.  The lime juice does most of the work for you.  Just put all the ingredients together and leave it in the fridge for an hour and a half to two hours.  I barely felt like I was cooking since every step just takes a couple of minutes and in between I was watching t.v. and listening to Gipsy Kings on Pandora. 

    This goes great with a garlic and onion rice and grilled steak.  A terrific trio: sweet and tangy ceviche, rich and "garlicky" rice and savory steak.

    Ingredients

    For Ceviche:

    4 Tilapia Filets 
    1/4 Cup Olive Oil
    4-5 Limes (juiced)
    3 Garlic Cloves  (finely minced)
    1/2 of a Small Red Onion (thinly sliced)
    1/2 of a Mango (cubed)
    1/2 TBSP Salt
    Crushed Red Pepper and Crushed Black Pepper 
    Cilantro

    For the Rice:

    6 Cups Cooked Rice
    1/8 Cup Olive Oil
    1/4 Stick Butter
    1/2 TBSP Salt
    1/2 TBSP Garlic Powder
    2-3 Garlic Cloves (minced) - Yes, I know, we LOVE garlic!)
    1/2 Cup Yellow/White Onion (diced)


    STEP 1:  Rinse off fish and pat dry.  Cut in half lengthwise right down the seam.  You should have two long strips of fish- one thick, one thin. Then cut each strip into medium slivers, anywhere between 1/4 to 1/2 inch.  Don't cut too thin or it will fall apart in the marinade.  But don't cut too thick either or it won't soak up the juices as well.  Place in a glass casserole dish big enough to allow most of the fish to lay flat.

    STEP 2: Add lime juice, olive oil, garlic, salt and sprinkle with the crushed red peppers.  Wrap with plastic and refrigerate for one hour. 

    STEP 3:  Add onions and mangoes to ceviche.  You should do this about 30 minutes prior to eating so they get to mingle with the juices and fish but still look and taste fresh. 

    STEP 4:  When you are ready to eat, use a slotted spoon and place ceviche on a bed of garlic rice.  Make sure the rice is not steaming hot.  Sprinkle with crushed red and black pepper and chopped cilantro.


    Garlic-n-Onion Rice:

    Cook rice in rice cooker.  In my Tiger Rice Cooker, I fill the rice up to the 3-cup level and add water to just a tad past the 5-cup level.  You want the rice to be a bit drier than asian rice but not undercooked. 

    After rice is done (usually takes about 15 minutes), spray non-stick on pan and saute garlic and onions on medium heat.  Make sure not to burn or brown them.  Remove from heat once onions look translucent. 

    Spray a large mixing bowl with non-stick and scoop out 6 cups of rice into it.  While the rice is hot, add all ingredients and stir until butter is completely melted.  Okay, how ridiculously easy is that?


    NOTES:

    • How to tell when ceviche is done:  Look for change in color from slightly translucent to white and increased firmness.  It's really the same concept as if you were actually cooking it. 
    • How to cut a mango:  I have met several people who don't know how to cut a mango.  It's really easy and can be done in a couple of minutes.  First, peel the skin with a peeler.  The mango has 3 parts, the two sides of flesh on the front and back and the large seed that almost takes up the entire length of the fruit.  After peeling, take a knife and poke at the flesh to determine where the seed is.  Then slice down the length of the fruit right up against the seed.  Do the same to the other side and you now have two large pieces of mango.  You will still have some fruit on the left and right sides of the seed which you can cut off as well and get two slivers of fruit.  
      

      Thursday, July 8, 2010

      Grilled Orange Ginger Snapper


      Grilled Orange Ginger Snapper

      Yesterday, on one of my regular Costco runs, I came across two lonely Red Snappers calling my name. It was another 100 plus degree day and I just wanted something light and simple that would go with some lettuce wraps or my daily rice noodle salad bowl. 

      This was so easy and required no measuring.  Although I did have to de-scale the fish, which only took a few minutes.  Just take a medium sized knife and run it against the scales until skin is nice and soft. Then rinse, pat dry and cut 3 diagonal slits on both sides of the fish.  Slice orange into 1/4 inch slices and save 2-3 slices to grill for garnish.  Zest the ends of the orange and rub all over the fish. Drizzle salt and garlic powder all over and in the slits.  Then slice up ginger and garlic and stuff into each slit.  You can reapply some more salt and garlic powder if you've lost some from handling the fish.  Finally spray with some non-stick spray and place on heated grill at 400-425 degrees for 20-30 minutes depending on the size of your fish.  

      The easiest way to tell if your fish is cooked is to look at its skin.  You will see it go from translucent to white.  If you take it off the grill and the fish is still not completely done, have no fear.  Just stick it in the oven at 450 for a few extra mins and you should be good to go. That way you don't have to worry about overhandling the fish and breaking it up.  When you're done, garnish with grilled orange slices and cilantro.  If you  have a large white platter, this looks absolutely beautiful on it.  I criss-crossed the two fish on top of each other, added the garnish and raced to grab my camera. 

      We had this with a side of Pad Thai Noodles and Roasted Green Beans and Red Peppers.  (Post coming soon!)  And definitely have a side of Ai's Fish Sauce handy.  Fish and ginger go great with fish sauce! 

      Tuesday, July 6, 2010

      Shrimp Salad with Rice Noodles (Bun Thom)


      Shrimp Salad with Rice Noodles
      (Bun Thom)
        
      Vietnamese salad is one of my favorite things to eat.  In fact, I think my husband will tell you it's all I ever eat.  But can you really blame me when it's 105 degrees outside?  For the carb-conscious, you can take it easy with the rice noodles or just skip it altogether.  I personally like very little to no rice noodles, not because I'm a carbophobe, but I just love love love the way the greens, veggies, cilantro and basil tastes with fish sauce and peanuts.  There's so much going for this dish that you hardly miss it at all. 

      If you're aiming for a straight salad, you'll be extremely pleased to know that there's no cooking involved whatsoever!  Yeay!  Even if you want rice noodles, it's only 5-10 minutes to prepare.  Simply boil water in a pot. Add the rice noodles and boil for about 5-6 minutes. Drain, rinse with cold water and let it sit in the strainer while you prep your bowl.  

      To save you the hassle of boiling and peeling shrimp, I highly recommend buying the 2 lb. bag of frozen cooked shrimp from Costco.  Place it in the microwave for 1 minute and drain. 

      For the salad:

      -Greenleaf Lettuce
      -Earthbound Spring Salad Mix
      -Julienne Carrots and Cucumbers
      -Bean Sprouts
      -Chopped Scallions
      -Crushed Peanuts

      Prep Bowl:

      There's no right or wrong way to do this.  Place greens on the bottom followed by the rice noodles.  Next come the veggies.  By this time, the bowl is getting ready to pop out and that's fine because next comes the shrimp to tame it down.  Finally, garnish with scallions, cilantro, basil, red hot chili pepper, and peanuts.  Bring on the fish sauce and you can now chow down!


      NOTES:

      I highly recommend this if you're planning for a picnic, any outdoor eating or if you're bringing a dish to a party.  It travels well.  Just put everything in a cooler until you're ready to prep.  

      You can also slice the shrimp in half horizontally if you wish. If I'm making this for a big party, this is usually what I do. People go crazy over shrimp!!! 

      If you bring this to work for lunch, be prepared to share.  Also make sure you have a jar with a nice tight  lid for the fish sauce and not the plastic containers.  I use baby food jars. They work perfect. 

      Saturday, July 3, 2010

      Vietnamese French Bread Sandwich


      Vietnamese French Bread Sandwich
      (Banh Mi Ga)

      A lot of you probably know what this is and many (if you live in an area like L.A.or Northern VA) probably eat this often at one of the local bahn mi shops.  However, what most people don't realize is just how easy it is to make this on your own. 

      Remember the Grilled Lemongrass Chicken we made?  Well, guess what else you could do with it?  You got it!  Bahn Mi!  In this case, Banh Mi Ga.  Traditional Bahn Mi sandwiches use cucumbers and julienne carrots and daikon soaked in vinegar and sugar.  I'll show you how to do that later, but for now, since you've got leftover lemongrass chicken and veggies from the last meal, we're going to use that to introduce you to one of the best sandwiches you'll ever eat.  All the ingredients you have leftover from the last meal except for the rice, will be needed here. 

      Traditional bahn mi is made from those cute little baguettes.  They are crunchy on the outside and soft on the inside.  It's not easy to find these.  The ones I come across at popular grocery stores are too chewy, too light or too heavy.  If you can't find true Vietnamese baguettes or don't live near a Vietnamese grocery store, then your best bet is to buy a french loaf and slice it in long diagonals like the picture above. 

      On this sandwich I made a fresh garlic aioli spread which was DIVINE!  But you can use regular mayo if you don't have the time or desire to make the aioli.


      STEP 1: Cut bread in half horizontally and place in oven for 5-10 minutes at 375.

      STEP 2:  Make aioli.  I like to use the double boiler and whipping technique for mine.   I just think the heat and the whipping makes it thicker.  You need a heat resistant bowl to place over a pot with simmering (not boiling) water. Spray bowl with non-stick spray and place the following ingredients in the bowl. 

      3 egg yolks
      2 1/2 Tablespoon Canola or Vegetable oil
      1/2 teaspoon salt
      1 medium sized garlic clove micro-grated

      Once the water begins steaming, place bowl over pot and use hand blender to blend ingredients together. Blend for a few minutes until the yolks look paler and you have a thicker mayo-like consistency.  Just make sure not to let the water boil or you will start to have scrambled eggs instead.  Remove bowl from heat and set aside.

      STEP 3:  In a bowl, toss cabbage, carrots and cucumbers with fish sauce mix. 

      STEP 4:
        Warm up the chicken.

      STEP 5:  Spread a nice thick layer of aioli and scallions on both slices of the bread.  Add chicken, veggies and lots of cilantro, include the stalks this time.  You can also drizzle on more fish sauce at this point.  I also like to cut up a Thai chili pepper to top off the sandwich.

      Yummy! Eat and enjoy!